Guides / TutorialsHow to Create a Shipment
How to Create a Shipment
Last updated -
This comprehensive guide offers step-by-step instructions on creating shipments. Whether you're creating a shipment individually, in bulk, or manually, follow these clear steps to navigate the process effortlessly.
Single Shipment
To create a single shipment please follow these steps:
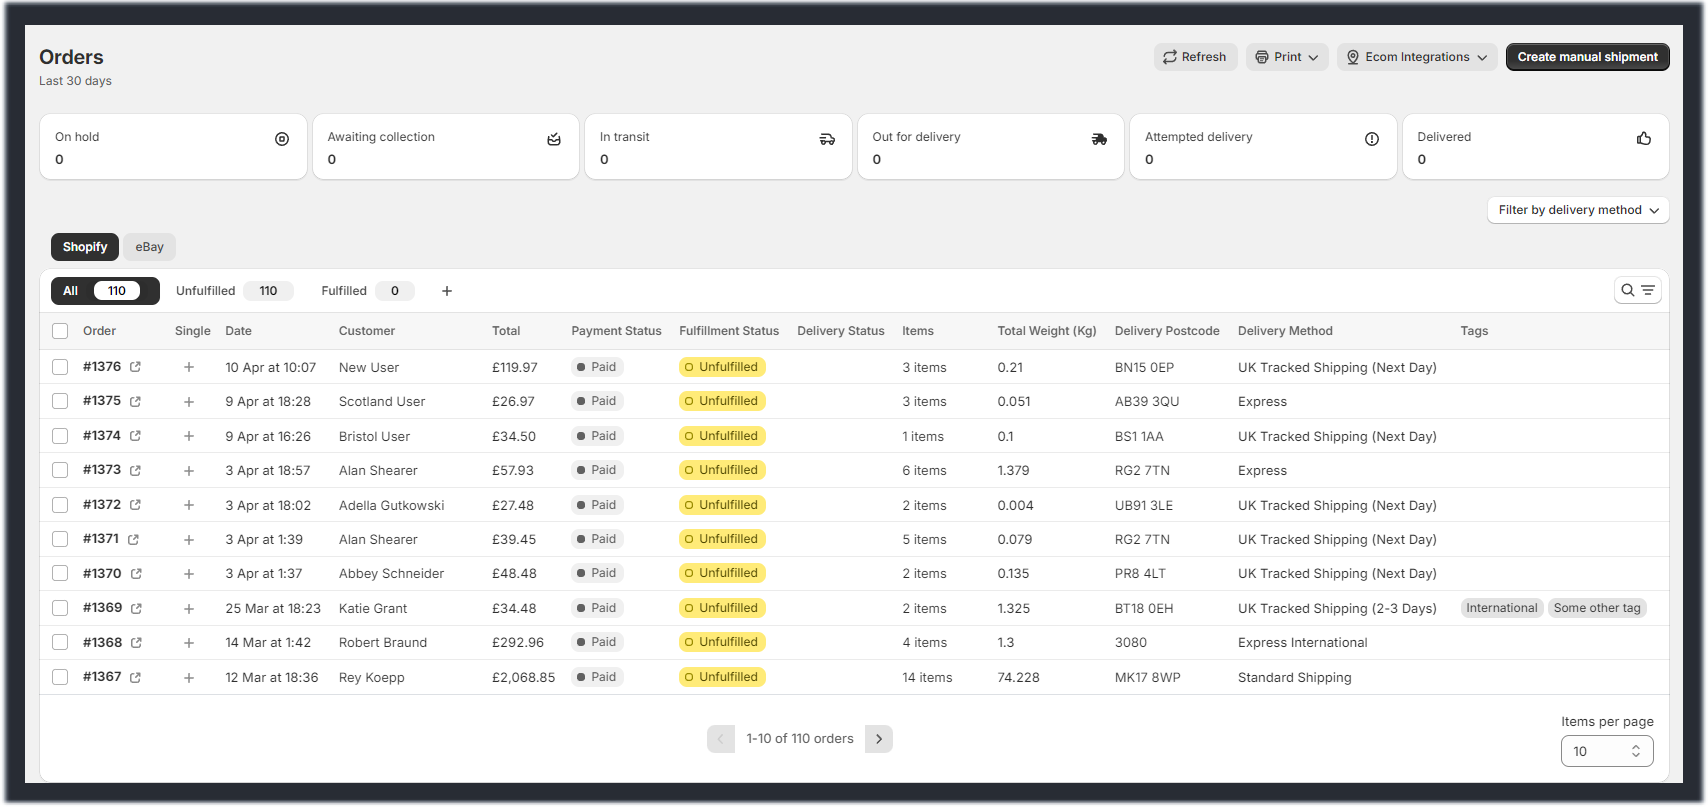
- Navigate to the "Orders" section in the app.
- Identify the specific order for which you want to ship.
- Click the + icon under the Single column for the corrosponding row.
- Review the selected order and make any necessary adjustments.
- Click the create shipment button to complete the process.
Bulk Shipments
Here's how to create multiple shipments simultaneously:
- Navigate to the "Orders" section in the app.
- Identify the specific orders you want to ship.
- Select multiple orders using the checkboxes or by clicking the order ID.
- Upon selection, the create shipping labels dialog seamlessly emerges.
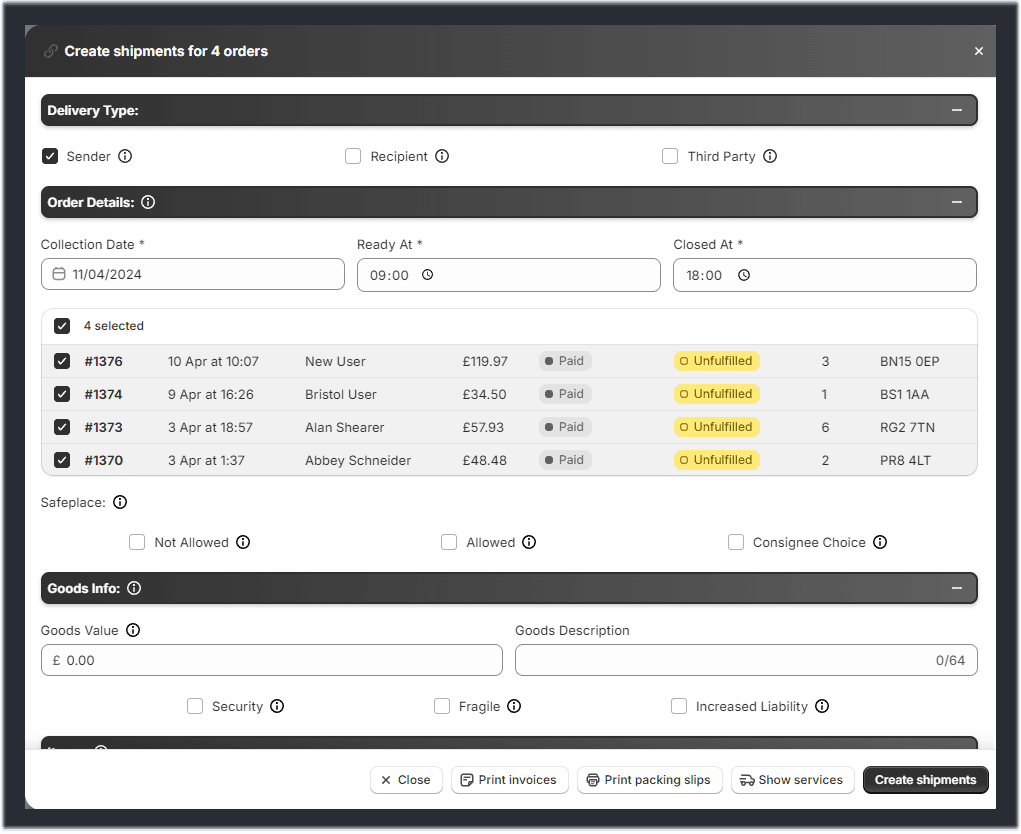
- Click the create shipping labels button to open the bulk shipments window.
- Review the selected orders and make any final adjustments.
- Click the create shipments button to complete the process.
Manual Shipment
Ideal for scenarios requiring manual data entry, such as orders received over the phone or in-store. This option provides flexibility for unique situations where manual entry is preferred.
Follow these steps to manually create a shipment:
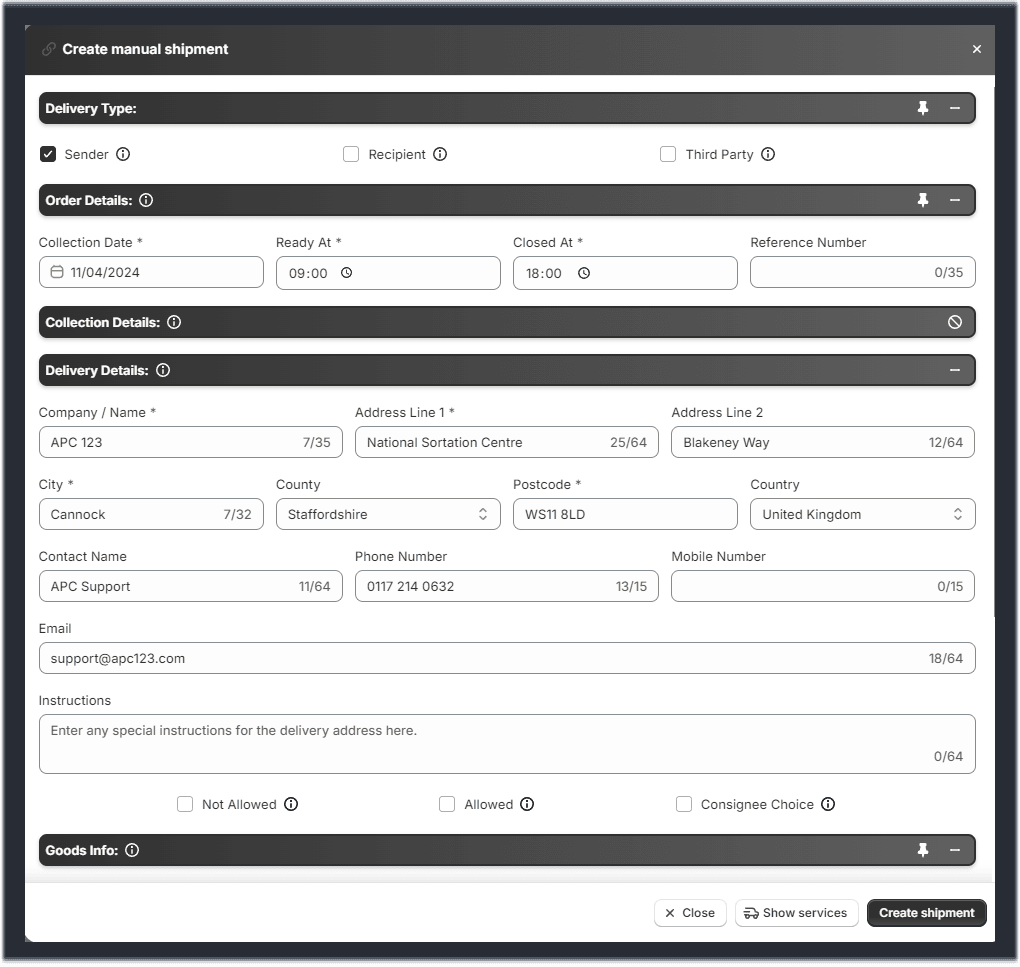
- Locate the 'Create manual shipment' button within the app.
- Click on the button to initiate the manual entry process.
- Fill in the necessary shipment details, such as recipient information, package specifications, and shipping method.
- Click the 'Create Shipment' button to finalize.
Was this helpful?